How to use a soldering iron?
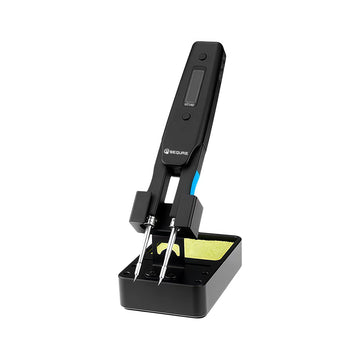
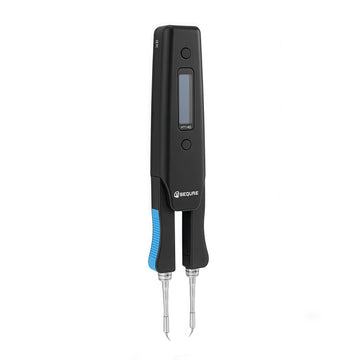
A tutorial that novices can use, and a mini soldering iron that novices can also control.
The use of electric soldering iron requires some auxiliary tools, of which solder and flux are the most important.
Solder Wire: Solder wire with rosin core is generally used for soldering electronic components. This kind of solder wire has a low melting point and contains rosin flux, which is extremely convenient to use.
Flux: The commonly used flux is rosin or rosin (dissolve rosin in alcohol). The use of flux can help to remove oxides on the metal surface, which is good for soldering and protects the soldering iron tip. When soldering larger components or wires, solder paste can also be used. But it is corrosive to a certain extent, and the residue should be removed in time after welding.
Attention should be paid to the selection of solder and flux:
Use low melting point solder wire and non-corrosive flux, such as rosin. Industrial solder and corrosive acid soldering oil are not suitable. It is better to use solder wire containing rosin, which is very convenient to use.
After selecting the auxiliary tools, we enter the pre-welding processing stage
Before soldering, the component pins or the soldering parts of the circuit board should be pre-welded.
1. Remove the oxide layer of the welding part
A small knife can be made with a broken saw blade. Scrape off the oxide layer on the surface of the metal lead to expose the metal luster to the lead.
The printed circuit board can be polished with fine gauze paper and coated with a rosin alcohol solution.
2. Tin plated components
Plating tin on the scraped leads. After the lead is dipped in the rosin alcohol solution, press the hot soldering iron tip with tin on the lead and rotate the lead. It can make the lead wire evenly plated with a thin tin layer. Before the wire is welded, the insulation cover should be stripped off, and then the above two treatments can be formally welded. If it is a wire with multiple wires, it should be twisted together after lighting, and then tinned.
Scrape off the oxide layer and plate a layer of tin evenly.
After the pre-welding treatment is done, the welding can be formally carried out.
welding:
Hold the soldering iron in one hand, and use needle-nose pliers or tweezers to clamp the component or wire in the other hand. Before soldering, the soldering iron should be fully preheated. To eat tin on the edge of the soldering iron tip, bring a certain amount of solder.
Then put the tip of the soldering iron against the solder joint. The soldering iron is at an angle of about 60°C with the horizontal. So that the molten tin flows from the tip of the soldering iron to the solder joints. The time that the soldering iron tip stays at the solder joint is controlled within 2 -3 s.
Then lift the tip of the soldering iron, still holding the component in your left hand. After the tin at the solder joint has cooled and solidified, the hand can be released.
Finally, use tweezers to rotate the lead to confirm that it is not loose, and then use the pliers to cut the excess lead.
Examination:
A good solder masterpiece should be bright, smooth and free of burrs, with a moderate amount of tin. The tin and the solder are fused firmly. There should be no false welding and false welding.

Among them, virtual soldering means that there is only a small amount of tin soldering at the solder joints, resulting in poor contact, which is always on and off. False soldering means that the surface seems to be soldered, but it is not actually soldered. Sometimes the lead can be pulled out of the solder joint by pulling it by hand. These two situations will bring great difficulties to the debugging and maintenance of electronic production. Only after extensive and serious welding practice can these two situations be avoided.
Summary:
When soldering, the temperature of the electric soldering iron should be higher than the temperature of the soldering tin, but it should not be too high.
It is better to smoke when the soldering iron tip touches the rosin. If the soldering time is too short, the temperature of the solder joints is too low, the solder joints are insufficiently melted, and the solder joints are rough and easily cause false soldering. On the contrary, if the soldering time is too long, the solder is easy to flow, and it is easy to overheat the components and damage the components.
The amount of solder on the solder joint should not be too small, too small, the soldering is not strong, and the mechanical strength is too poor. Too much can easily cause a lot of appearance but not connected inside. The solder should just immerse the component pins on the solder joints, and the outline should be faintly visible.
Beginners usually move the soldering iron back and forth or squeeze it hard when soldering. This method is wrong. The correct method is to use the tin-lined surface of the electric soldering iron to contact the soldering point, so that the heat transfer area is large and the soldering speed is fast.
When disassembling the component from the circuit board, you can stick the electric soldering iron tip on the solder joint, and pull out the component after the tin on the solder joint melts.
Flux (rosin and soldering oil) is the key when soldering. Fresh rosin and non-corrosive soldering oil can help you complete the soldering well, and can make the surface smooth and beautiful. You can use more flux when using it.
Welding skills are also key
In the repair and production process, welding work is essential. It not only requires the components to be fixed on the circuit board, but also requires the solder joints to be firm and smooth. Therefore, the quality of soldering technology directly affects the success of electronic production.
herefore, soldering technology is a basic skill that every electronic production enthusiast must master.
Dear Customer/DIYer
Thank you very much for your support and hope you have a happy and interesting shopping experience. We are very welcome to the majority of customers and friends to participate in our DIY interesting articles sharing activities.
Share & Cash Back
The number of words is more than 300 words, have exquisite picture in the article. Send us your article. After check your article and it pass through, we will cashback the amount of 5-8 dollars according to the quality of the articles.
Welcome to contact this email (info@sequremall.com) and send us the articles for checking.


