Electric screwdriver - which offers convenience, speed, and precision that the traditional manual screwdriver cannot match - is a flexible, time-saving, and efficient tool for you to assemble & disassemble electronics, furniture, computers, RC models, or DIY. More and more people tend to use an electric screwdriver to replace the traditional driver.
We SEQURE therefore launched 2 smart cordless electric screwdrivers - ES555 & ES666 - which are upgraded based on ES126, one of the electric screwdrivers we launched a few years ago. We heard from our customers, improved the ES126, and finally developed these 2 smart drivers. They have all the advantages of ES126 while also having new features. Let’s explore together!
Intelligent Control Mode
We offer several modes for you to control your screwdrivers: Auto Mode(unique design), Fixed Mode, and Sensing Mode( ES555 NOT equipped). In auto mode, the screwdriver starts & stops automatically, free your hands! This is an innovative design, it was not present in the world before we launched these 2 drivers. And now, it is present! In fixed mode, directional forward/reverse rotation, great for a large number of assembly & disassembly to save time and effort. In sensing mode, it only takes a small turn of the wrist to freely rotate clockwise and anticlockwise.
Adjusting Torque Gears: Power Meets Precision
SEQURE cordless screwdrivers empower you with adjustable torque gears - 7 gears for ES666, and 3 gears for ES555 - to meet different project requirements and ensure precise and consistent screwing operations. Equipped with a brushed motor for a fast start brake, the highest speed is up to 250rpm/min, electronic torque up to 0.2N.m, and manual torque up to 2.2N.m.
Multilingual Display
Comes with an intuitive user interface that makes setup and operation a breeze, you can customize settings and monitor performance with ease. Offer a multilingual menu for you to choose, now we support Chinese/English/Russian language. In the future, we will add more language for you!
Large Capacity Battery
A built-in large-capacity battery ensures this screwdriver can work continuously for up to 4 hours (no-load), totally satisfying your electronic repair work. Wireless design, reduce mess, portable for field repair, indoor & outdoor screwing operation.
30 Magnetic Bits, The Foundation of Versatility
SEQURE screwdrivers are equipped with 30 pcs of S2 steel bits, each tailored to different screw types and sizes. The small, interchangeable bits can impact the driving force. Choosing a suitable bit for a screwdriver according to the project requirements can achieve twice the result with half the effort. With built-in strong magnet, it can attract the screws and take them out, save time & energy!
Anti-Slip Design
We add anti-slip strips to the metal body so that the screwdriver will not slip out of hand, offering a stronger grip. This design is suggested by our customers. They reflected that the ES126 sometimes will slip, and wished we could improve this point. Therefore, we changed the body to a linear structure to strengthen the grip.
Compact & Lightweight
Buy SEQURE ES555 Smart Screwdrive via this link: https://bit.ly/48zGDoG
Buy SEQURE ES666 Smart Screwdrive via this link: https://bit.ly/3Nh8M9B
]]>
how to build this upgraded DIY spot welder
𝗣𝗮𝗿𝘁𝘀 𝗳𝗼𝗿 𝘀𝗽𝗼𝘁 𝘄𝗲𝗹𝗱𝗲𝗿:
Spot welder controller
Welding handle
9V AC transformer
Microwave transformer
Cable connector (2 sets 35-50)
Foot pedal switch
35mm² cable (3 meters)
Copper electrodes
AC input Jack
AC cord
2.1mm DC input jack
Brass standoffs
Heat shrink tubing (12 mm)
Cable lugs 35-10
Enclosure
SQ-SW1 worth the investment if you are making many batteries.
Hope you give this project a try! ✌️
]]>
Because most of 18650 lithium batteries welded with electric soldering iron are manual welding, it is difficult to add tin and control the welding time. During welding, the diaphragm inside 18650 battery may shrink and lead to internal short circuit. There are great potential safety hazards in direct welding with electric soldering iron. If electric soldering iron must be used for welding, it is recommended to stagger the welding after spot welding nickel sheets on the surface of 18650 battery, so that the heating inside the battery cell will be greatly reduced. However, it should be noted that each soldering time should not be too long and the temperature of electric soldering iron should not be too high.
The advantage of spot welding is that it can be welded very fast and firmly in one second. Spot welding is mostly used for the assembly of lithium battery. Because the welding time is very short, there is little heat on the surface of lithium battery. Although the price of spot welding machine is slightly higher than that of electric soldering iron, the money of spot welding machine cannot be saved if more lithium batteries are assembled.
For spot welding, there must be nickel plated strip or pure nickel strip. The method of spot welding is to cut a section of nickel strip and place the nickel strip at the position to be spot welded. For example, the figure below shows the lithium battery for spot welding.
Sequre is a manufacturer focusing on R & D and production in the field of spot welding machines. There are portable spot welding machines with external batteries and mini spot welding machines with built-in batteries. The thickness of nickel sheets supported are 0.1-0.3mm and 0.1-0.2mm respectively. With excellent materials and complete supporting facilities, Sequre is a good choice for many battery DIY lovers. Sequre also provides various types of electric soldering irons, including those used at home and in studios, as well as portable electric soldering irons used outdoors. Many RC and FPV lovers choose Sequre electric soldering irons. Welcome to buy. If you have any customization requirements, you can contact us at any time.
]]>
Let's first understand what is the KV value of brushless motor: the KV value of DC brushless motor is high and low, the low is 1000-2000, and the high is 5000-6000. It represents the value of speed increase for every 1 volt increase in voltage. For brushless motor, this value is a constant.
For brushless DC motors of the same size, those with more winding turns have low KV value and low high output current, but high torque. Those with less winding turns have high KV value and high output current, but low torque.
Of course, the quality of the motor cannot be judged by the size of KV value, because different KV values have different applications.
Assuming that the low-voltage environment of the brushless DC motor is 7.1v and the KV value is low, due to the low speed, it is suitable to be equipped with a smaller reduction ratio and a larger propeller, rely on a larger load to increase the current and output a larger power. For those with high KV value, due to the high speed, it is suitable to be equipped with larger reduction ratio and smaller propeller. Under the condition of meeting the output power, reduce the load and avoid excessive current.
Assuming that the high voltage environment of Brushless DC motor is 11.5V and the KV value is low, it can achieve high speed and good torque under this voltage environment. It is ideal. It needs to be matched with large reduction ratio and small propeller. Under the condition of meeting the output power early, it is necessary to reduce the load and avoid excessive current. If the KV value is high, the speed is too high in this environment. In order to avoid excessive current, the load should be reduced as much as possible. Its high speed is very suitable for culvert fan engine.
Of course, the user can provide the KV value that needs to be achieved to SEQURE, and we will recommend a suitable brushless DC motor to you.
]]>
For their connection, the general case is like this:
In addition, the ESC generally has a power output function, that is, between the positive and negative poles of the signal line, there is a voltage output of about 5V, which supplies power to the receiver through the signal line, and the receiver supplies power to control equipment such as steering gear.
It is no problem for the output of the ESC to power three or four servos. Therefore, electric aircraft generally do not need to supply power to the receiver separately, unless there are many steering gears or high requirements on the power supply of the receiver.
The main application of ESC is on toy models such as aircraft models, car models, ship models, flying saucers, frisbees and so on. These models drive the motor to complete various commands through ESC, imitating its real working function, so as to achieve the effect similar to the real situation. Therefore, there are aircraft model ESC specially designed for aircraft models, car model ESC designed for car models, and so on. The function of the ESC is to control the motor to complete the specified speed and action. Therefore, ESC also have a wide range of applications in production and life, such as ESC on power tools, ESC on medical equipment, ESC on automotive turbines, special ESC for special fans, and so on. Some ESC manufacturers will customize the ESC for you according to your different needs and motor parameters.
SEQURE provides ODESC for driving brushless motors, ODESC 3.6 is based on the open-source project ODrive for hardware optimization and enhancement, stable performance, and matching the original firmware of Odrive. More affordable, better cooling performance. Welcome to customize and buy!
]]>
No |
picture |
|
|
1 |
name |
T12 soldering iron tip |
TS soldering iron tip (001 soldering iron tip) |
2 |
length |
150mm |
110mm |
3 |
weight |
7.5g |
11g |
4 |
retail price |
Low (retail price $6.99) |
High (Retail $9.88) |
5 |
Tip terminal temperature |
Thermal conductivity is average (high) |
Low thermal conductivity (low) |
6 |
time of appearance |
morning |
Night |
7 |
market share |
many |
few |
8 |
Types of soldering iron tips |
many |
few |
9 |
24V power supply 30 ℃ heating time to 300 ℃ |
9s |
8s |
Describe |
SI012 |
SQ001 |
picture |
|
|
display |
0.91 inch OLED |
0.69 inch OLED |
Display brightness |
Can be set |
Not settable |
buzzer |
Can be set |
none |
Suitable for soldering iron tips |
T12, 001 |
001 |
shell material |
Transparent environmental protection material |
Opaque environmentally friendly material |
power-on state |
Standby/auto heating can be set |
Standby |
PD3.0 power supply |
support |
not support |
Wake Sensitivity |
Can be set |
Not settable |
Temperature compensation |
support |
not support |
temperature calibration |
support |
not support |
Toolkit |
have |
none |
Tin wire tube |
have |
none |
unit conversion |
°C/°F |
°C/°F |
left and right hand |
support |
support |
Firmware upgrade |
support |
support |
Voltage alarm |
support |
support |
The position sensor control is to install a position sensor on the DC motor stator to detect the rotor position and control the commutation of the stator winding. The position sensor used has electromagnetic type, photoelectric type, magnetic sensitive type and so on.
No position sensor does not directly install a position sensor on the stator of the motor to detect the rotor position. It generally uses direct back-EMF detection, back-EMF third-harmonic method, current path monitoring method, open-circuit phase voltage detection method, phase inductance method, back-EMF Logic level integral comparison method and other methods to indirectly detect the position of the rotor.
Three, intelligent control
Intelligent control generally includes fuzzy control, neural network control, expert system, etc. Intelligent control system has functions such as self-learning, self-adaptation, self-organization, etc., which can solve model uncertainty problems, nonlinear control problems and other more complex problems.
For the above three control methods of DC motors, we can already use the first two more skillfully, but there is still a lot of room for the development of intelligent control, so we want to improve its performance and there is still a lot of development. space.
SEQURE provides brushless DC motor controllers ODESC3.6 ,high speed BLDC motor controller is designed for electric motorcycles and electric scooters,based on the open source project ODrive controller for hardware optimization and enhancement, design integrated with a heat sink. Best choice.
]]>
Content |
||
picture |
|
|
show |
1.8 inch LCD large color screen |
0.96 inch OLED |
Battery |
Built-in battery |
External battery |
Accessories |
All accessories are complete, ready to use |
Need external battery |
shell |
All aluminum alloy shell |
Low power consumption |
Yes |
/ |
Solder pin |
Replaceable |
Replaceable |
Thick soldering pen wire |
8AWG |
6AWG (the thickest) |
Automatic shut-down |
Yes |
no |
PCB high temperature alarm |
Yes |
no |
Upgrade firmware |
Yes |
no |
Charging reminder |
Yes |
/ |
Charging current display |
Yes |
/ |
Operating mode |
automatic / manual |
buzzer |
Yes |
no |
Screen flip |
Yes |
Yes |
Real-time temperature monitoring |
Yes |
no |
Solder spot count |
Yes |
Yes |
Nickel strip thickness |
0.1mm-0.2mm |
0.1mm-0.3mm |
At the same time, sequre is also equipped with many accessories needed on the DIY battery pack, including balanced charging, lithium battery, nickel sheet, BMS protection plate, heat shrinkable tube, highland barley paper and so on. You can buy all the goods you need in one store, which is very convenient. Finally, you are welcome to choose sequre spot welder.
]]>Length: 135mm |
Diameter: 18mm |
Weight: 124g |
Charge Time: 40 Minutes |
Run Time: 60 Minutes |
Available From: Sequre |
Price: $108.99 |
Have you ever wanted an electric screwdriver for those long or numerous attachment screws used on drones and rc aircraft? I sure have. A long time ago I used to have a huge electric screwdriver which was great for around the house projects, but it was totally useless for the RC hobby. When Sequre reached out and offered for me to review their hobby sized electric screwdriver, I jumped at the opportunity to see how a smaller driver could be useful on my workbench. Let's start out by taking a look at what you get in the box.
Sequre ES 126 Electric Screwdriver Review (7 min 38 sec) |
The screwdriver is a nice size and weight and it feels like a quality product with its all metal construction. I like that it charges up via USB-C and the OLED screen is bright and easy to read. The instruction manual that came with the unit is vague at best and doesn't provide much useful information on how this thing actually works. I was able to play around with it and then the manual started making more sense. It took me a minute to figure out how to change the direction of the bit. There are two buttons so I first thought one button would go clockwise and the other button would be counterclockwise. The two buttons actually do the same thing, run the driver, it's just that one will operate the driver with a light at the tip and the other one does not activate the light.
To change the rotation direction, you just twist the driver in the direction you want like you would if you were manually operating a driver. It works, but since you don't actually need to manually operate the driver with an electric screwdriver, I would have preferred that the buttons would activate the light and operate the driver in opposite directions. I like that tactile feel better and it would be harder to run the bit in the wrong direction. You do get used to it though and it becomes more natural after some use.
That said. It does work quite well and offers different torque ratings. There is no info in the manual to indicate how much force the driver is able to apply and I could hardly tell a difference when changing the various settings. I just leave it in the P or 1 setting which should be the highest settings. It has an Angle sensing mode too, that varies the speed of the bit based on the the tilt angle of the driver, but I didn't find that very useful.
You are able to update the firmware via USB if desired. I don't see myself doing that unless there is a major release that allows direction control via the buttons instead of the twisting motion, but it's there and nice to have that option to update if desired.
So what do I think after using this electric screwdriver? Overall I like it. It does what it's supposed to and it feels and looks like a premium product. With a $100+ price tag, I would expect nothing less. The power of the unit is not quite enough to fully finish a job, but it will get you 99% there with the final 1% needing to be done by hand to make sure all your screws are right and tight. It will be up to you to decide if you need something like this. I see it as a luxury item if you have the dough to blow vs a must have tool. It won't do anything that you can't do with an analog screwdriver, but it is nice to use when building drones that have a lot of attachment points for the frame and electronics.
]]>
Unboxing:
The unboxing experience of stepper motor 42 is quite simple and elegant. It comes in a cardboard box when opened you are greeted with an instruction manual which has pretty simple and straightforward printed instructions along with diagrams. And we need that we have the motor along with which the tiny driver is attached. That's all for unboxing and its contents. Seeing this we believe that the setup process is quite simple and elegant as well. Any additional beneficials or components that are required to be a part of the larger set up are to be purchased separately.
Product description:
When building a complex machinery, the sides of actuating motors is very important. If these motors tend to be larger in size the overall size of machinery and its footprint can be very massive. This creates problems like transporting them or maintaining them as well. The stepper motor along with its driver measures in at about 40 mm cube formation. The circuitry is exposed and attached to the back of the motor with its control wires protruding out of the board. The overall form factor of stepper motor is very compact and has a very small footprint. This unit weighs in at about 305 grams which is not that much considering its tiny size and immense power that it delivers. Considering the technical aspects of the stepper motor and its driver we are treated with some pretty impressive specification sheet. To begin with it's a two-face stepper motor, that means the speed controller is quite simple and provide a wide band of operation. It has a step angle of about 1.8 degrees. It operates at about 3.6 volts and the rated current can go as high as 1.5 volts per phase. the next big question is that are produced by this tiny motor. To our surprise it produces about 420mN holding torque and about 15 mN positioning torque at any given instant. Impressively this motor can be operated in open loop and closed loop mode as well. The driver circuit is very compact and delivers pretty accurate feedback loop to the entire system. The speed alteration and phase angle compensation are precise which is very handy when such motors are placed in a complex and accurate system such that of a 3D printer. The wedding schematics off the stepper motor and its driver are pretty simple as well. The major components and wiring connections that are present on a standard level or also available here. The voltage-controlled probe, the ground fire junction, the control signal input, the directional control signal pin, enable controlling signal pin and lastly the reference mode selector is also provided in this tiny circuitry of the controller. These controls provide us with accurate and precise moment and speed control. You see observe closely we find such motors very practical and almost a part of everyday electronic appliances. These are widely used in find closed loop positioning which is required in 3D printing, the game controller feedback motors, the speed cycle record player, various sort of valve control devices and lastly the impedance control in various power electronics circuits are all controlled by stepper motor and its intelligent driver. hey verse control feedback loop on the stepper motor is also very impressive. Its power delivery is very smooth and the driver performs a very fantastic job at controlling the speeds and phase angle.
Final verdict:
Coming in at about $45 we consider that the stepper motor along with its intelligent driver provided by Sequre is a very essential component of electrical machines. We would not be north if we say that these are basically the nervous system of a performing complex electrical machine. The tiny packaging, that packs this amazing torque an instant power delivery is of no match. And on top of that we are also provided with a very intelligent yet tiny circuit driver. All in all, we consider the stepper motor a very useful an essential component for any electrical project.
1.USB connection with PC , Raspberry PieRos , etc , for programming control
2.DC power input interface
3.Connect the M1 motor cable
4.Connect power resistor
5.Connect MO motor wire
6.Mo , & M1 encoder position , connect MO. M1 . Corresponding to the Hall Line
7.MO Hall wire connection
8.M1 Hall wire connection
9.RC receiver connected to ODESC
10.USB connection PC end Setting Control ODESC
11.Calibration detection M1 Hall sensor
12.Cut off the PC and turn on the RC remote control to match the receiver. Use the RC remote control to control the motor stably.
Unconditioned reflex happens once the body turns into a piece of the electrical circuit. Either once a private comes fully informed regarding each wire of an electrical gadget. So, one wire of an empowered circuit and the ground that has gotten stimulated by contact with an electrical transmitter.
In case; you are looking forward to purchasing electrical equipment from an amazing shop that will inspire you. The Sequre Mall is affirmed to be the shop that has the first aggressive costs once, often running glimmer deals, Clearance, and Discounts. At the most financially efficient esteem. They unexceptionally draw out a limits program to make certain customers.
It will get the least complex things from their store. The average amount, for the most part very surprising, reaches looking at the item you pick on the site. Here at this spot, you might have the option to see any item that you are simply looking for essentially by certain snaps at Sequre Mall.
You get a fair arrangement or apply the Sequre Mall coupon code. So, you must urge every one of the items that satisfy each need at the best price. Here are the best solutions for your electrical equipment condition
In-home electrical appliances, if we use inappropriate ways, can prevent electrical problems. To get an authentic solution, you should check all light and their fixture data to use the right watts consumptions. In case your lights have no data label, then you have to use energy-efficient/ saver lights. New inventions of LED bulbs take low power, decreasing the risk of fixtures overheating.
Numerous deficiencies with work instrumentality might be found all through a simple visual investigation:
All power appliances and extensions should regularly check for indications of fraying and breaking, and that they should then be fixed or replaced. The electrical appliances mustn't be secured into a spot or run underneath carpets and articles of furniture. Strings under the carpets cause a stumbling danger and might overheat, though articles of furniture will squash wire safety.
The work of additional strings consistently could imply that you need more retailers to suit your needs. Have a guaranteed linesman who comprehends electrical security rules introduce further retailers in rooms where you regularly use additional lines. When purchasing an impact wire, examine the electrical burden it'll convey.
Likewise, there is prompt and semi-permanent harm on tissue, nerves, and muscle on account of warmth created by this moving through the body. The glow produced is resistive warming like would be created in warming loops during a little warmer. The extent of the outcomes of outside electrical consumption is regularly immediately obvious.
Nonetheless, the general aftereffect of interior consumption may become show a while later by misfortunes of imperative body capacities. In the sense of the obliteration of vital inner organs, along with parts of the framework, that is entirely powerless.
You should ensure that the electrical give is protected to utilize. Standard tests performed by an able individual misuse suitable instrumentation are fair for lessening hazards. Any place there's proof that the arrangement probably won't be protected, as broken instrumentation or wiring. So, the arrangement mustn't be utilized till work has been done to address this.
To observe electrical security rules, keep electrical instrumentation dry and eliminated from the water forestalls injury to machines. Once working with electrical machines, it's important to have dry hands. Keeps electrical instrumentation eliminated from plant pots, aquariums, sinks, showers, and baths brings down the risk of water and power returning into contact.
]]>Size: 170mm (with tip) |
Input Voltage: 12-24V |
Operating Temp: 300C |
Available From: Sequre |
Price: $52.90 |
Soldering in the field can save the day, especially if you traveled some distance to get to the flying site. Wires break and being able to fix it on site can be the difference between a fun day of flying or a sad trip back home. This Sequre 65W portable soldering iron is small and easy to keep with you in your field or transmitter box. It runs off of 12-24V DC so you can likely use one of your flight batteries to power it when needed. Let's check out what it comes with.
Accessories
One of the best accessories I'd suggest to purchase is the portable carry case. It's a nice zippered case that has pockets and elastic bands to carry the iron and all the supplies you'd want to have with you.
Carry Case
Holds all needed supplies for mobile soldering
The only thing you need to do is attach the soldering iron tip by inserting it into the slot and securing it with the provided screws on each side. The power lead just plugs into the bottom of the base and you are ready to solder. There's also a micro USB port on the bottom that can be used for firmware updates or changing the default parameters.
When you connect power to the iron, the digital display lights up with the brand logo and software version. Then it prompts you to press the A button to heat up the tip. That's a nice feature as the tip does not get hot just because you connect power to the unit. Once you press the A button the iron heats up to 300C which is the default temp. Press and hold the A button and you can then use the A and B buttons to select a different temperature up to 400C. I was using a 4S 1600mAH lipo during my testing and the iron quickly heats up to temp. The time it takes will vary depending on the input voltage. The manual states 40 seconds to reach 300C on 12V and 11 seconds on 24V. It seems to reach temp much quicker than stated however.
Once the iron is up to temp, it's ready to solder. The plastic body feels good in your hands and provides ample protection and control. I was easily able to solder up a Deans connector with about a 12AWG wire. I'm sure it will handle larger wire too, it may just need to keep the heat on a little longer. If you are going to be soldering larger wire and connectors, I'd suggest getting closer to 24V for your input source power. Overall, it does the job and it's easy to use. The user interface is intuitive and simple and I like seeing what the temp is on the screen.
I really like this soldering iron for field repairs and at events. It's small enough that it's easy to keep with your other gear which means that it will be there when you need it. Just hook up a flight battery and you are all set to fix any broken leads. It works great and hold temp for just about any RC soldering job you could need. The optional storage case is perfect for keeping the iron, solder, heat shrink and any other supplies you'd need to complete a solder job. I still use my home set up for normal soldering jobs, but this little unit is going to live in my RC go bag and I'm sure it will come in handy.
]]>18650 is the originator of lithium-ion batteries - a standard lithium-ion battery model set by SONY in Japan in order to save costs. 18 represents a diameter of 18mm, 65 represents a length of 65mm, and 0 represents a cylindrical battery
Noramlly 18650 batteries are divided into lithium-ion batteries and lithium iron phosphate batteries. The nominal voltage of the lithium ion battery is 3.7v, the charging cut-off voltage is 4.2v, the nominal voltage of the lithium iron phosphate battery is 3.2V, the charging cut-off voltage is 3.6v, the capacity is usually 1200mAh-3000mAh, and the common capacity is 2200mAh-2600mAh .
It is the same for lithium batteries marked 3.7V or 4.2V. It's just that each manufacturer's label is different. 3.7V refers to the platform voltage (typical voltage) when the battery is discharged during use, and 4.2V refers to the voltage when the battery is fully charged. Common rechargeable 18650 lithium batteries, the voltage is marked 3.6 or 3.7v, when fully charged is 4.2v, this has nothing to do with the power (capacity). The mainstream capacity of 18650 batteries ranges from 1800mAh to 2600mAh, (the capacity of 18650 power batteries is mostly 2200~3600mAh). It is generally believed that if the no-load voltage of the lithium battery is lower than 3.0V, it is considered to be exhausted (the specific value depends on the threshold value of the battery protection board, such as lower than 2.8V and 3.2V). Most lithium batteries cannot be discharged with no-load voltage below 3.2V, otherwise excessive discharge will damage the battery (generally, lithium batteries on the market are basically used with a protection board, so excessive discharge will lead to the protection board can not detect the battery, so that the battery can not be charged). 4.2V is the maximum limit voltage for battery charging. It is generally believed that the lithium battery is fully charged when the no-load voltage is charged to 4.2V. In the process of battery charging, the battery voltage gradually rises from 3.7V to 4.2V. Lithium battery charging cannot charge the no-load voltage above 4.2V, otherwise the battery will be damaged. This is the special feature of lithium batteries.
Buy a large box of 18650 batteries
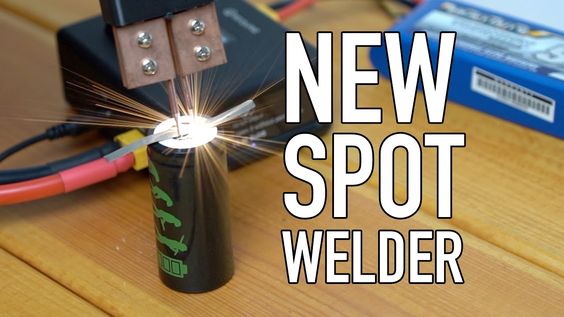
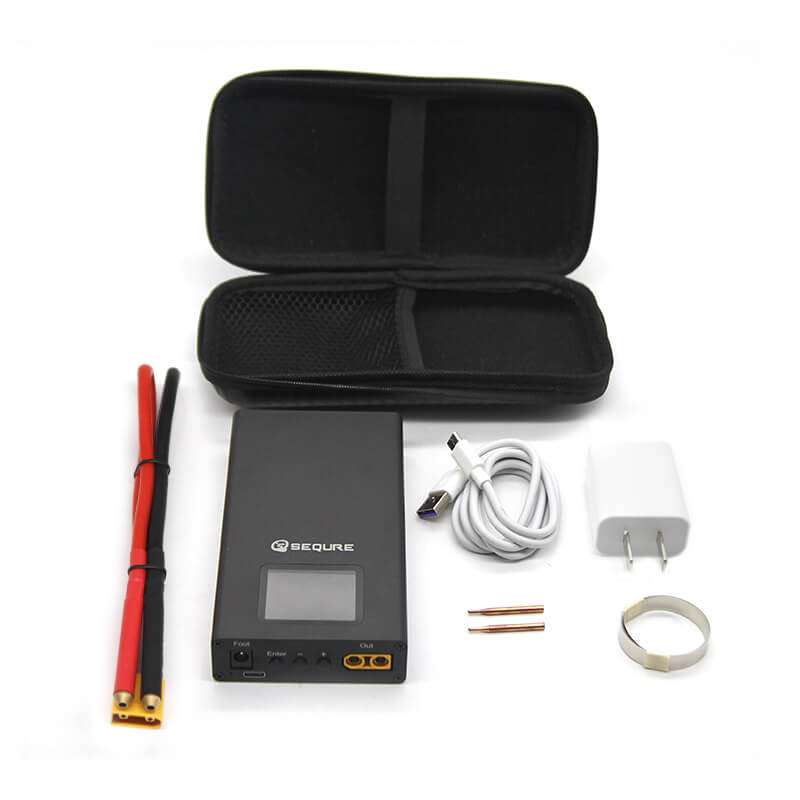
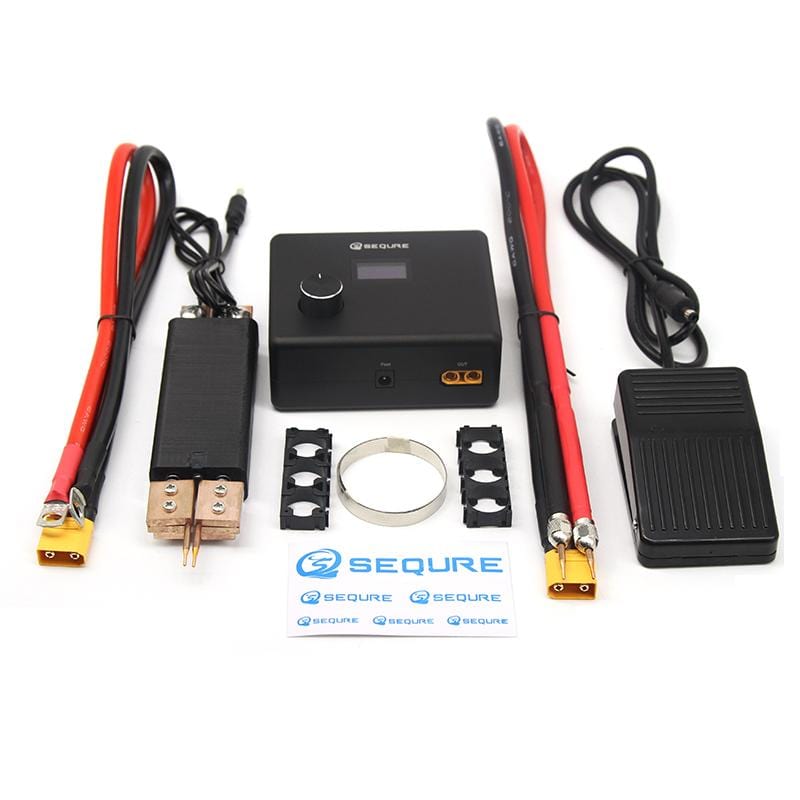
Prepare a spot welder, this is sequre SW1 spot welder
Make a nickel plate, which is used to connect the battery electrodes.
(Nickel sheets need to be cut in two lengths)
Use a special fixture to locate the battery and arrange the batteries
Weld the nickel sheet with the same electrode of the battery so that the batteries are connected in parallel. Only increase the capacity without increasing the voltage.
Every 7 in parallel, completely manual spot welding, this is the most space-saving arrangement.
Two two arranged in positive and negative directions. Use barley to directly insulate the battery row.
Each line of battery should be separated with highland barley paper to prevent skin damage resulting in short circuit. The voltage of the battery pack welded in series is multiplied by 13 times, 3.7v multiple by 13 is equal to 48.1v.
You can see the highland barley paper in the middle of two lines of battery.
The other side.
Secure the entire battery pack with duct tape and use a heat-resistant one as much as possible.
Cover the top and bottom with highland barley paper and fix it, mainly for insulation.
Fix the battery management protection module.
Handle the cable of the protection board, and separate the crossed cables with tape to avoid the risk of short circuit.
Cut off all the extra cable
Solder the wire to nickel plate
The protection board will heat up, so need to use two layers of 3M double-sided tape to separate the protection board.
Processing the positive and negative poles of input (use red copper sheet)
The exposed part of the copper sheet is wired to silica gel wire.
Strengthen the package.
The negative connection in the picture is in the lower left corner, and the positive connection is in the upper right corner. The diagonal design allows the current to be distributed as evenly as possible on each battery.
Then wrap it with duct tape again
At last, wrapped with the heat shrink tube.
]]>What is an 18650?
An 18650 is a lithium ion rechargeable battery. Their proper name is “18650 cell”. The 18650 cell has voltage of 3.7v and has between 1800mAh and 3500mAh (mili-amp-hours).
There are two types; protected and unprotected. We absolutely recommend protected 18650 batteries. And The average 18650 battery charge time is about 4 hours.
Protected vs Unprotected 18650 Batteries?
18650 protected batteries have an electronic circuit. The circuit is embedded in the cell packaging (battery casing) that protects the cell from “over charge”, heat or “over discharge”, over current and short circuit,It's safer than Unprotected 18650 batteries.
Unprotected 18650 batteries are cheaper, but we do not recommend their use.
How much power does an 18650 have?
A 3.7v a 3400mAh 18650 stores about 2 aH to max of 3.5 aH. It can store about 10 to 13 watt hours. In comparison, 110 18650s are smaller than three 12v 40 amp car batteries.
Recharge cycles vary and are limited. As the battery is reused (recharged), the battery degrades due to oxidation and electro-chemical degradation.This happens to any rechargeable battery.
You want to select rechargeable batteries that can be recharged many times. We specifically recommend 18650's because they have the ability to be recharged 300 to as many as 2000 times.
The way you charge the battery will affect the life of the battery. If you are not sure, please use the battery level indicator, it will let your charging needs be confirmed. For a flashlight, use it until the light dims or goes out.
Here is a list of some ways you can tell if you need to get rid of an 18650 (or other rechargeable battery).If you ignore these warning signs you risk fire or even having the battery explode while being recharged.
1.The battery will lose a charge on the shelf must faster than normal. It loses it's charge after a couple of days or even worse overnight.
2.The battery gets hot when charging or discharging, warmer than normal.
3.Recharge time gets abnormally long.
4.If there is ANY cracking or deformation in the battery.
What is the battery protection mode 3.7v 18650 3000 mAh low self-discharge?
“3.7v” – is the optimal or peak voltage. It will drop as you use the battery.
“3000 mAh” measures the amp hours the battery can provide. A higher number is better. The highest realistically availble on an 18650 today is about 4000 mAh.
“Low self discharge” is a good thing. That means it will hold a charge in storage. The less it loses in storage the more charge will be left for you to run your flashlight or other device.
What are 18650 batteries used for?
Flashlights, DIY electric skateboards, DIY electric bicycles, remote controls, laptops, electronic cigarettes and even some electric cars use 18650. Tesla used 7,180 such batteries.
If you are familiar with electronic products, you can use a spot welder to manually DIY some battery packs, but be careful-using the wrong type of 18650 or improper use may cause a fire.
18650 Battery Charger
18650 batteries are rechargeable, so you will need a good charger. The best 18650 battery charger is the Imax-B6 because it can charge pretty much anything.Specifically, B6 is a multifunctional smart charger that can be used for Li-Po, Li-Ion, Li-Mn, Li-Fe,NiMH, NiCD, and Pb batteries are charged/discharged.
Have you mastered the above knowledge about 18650 battery? Please pay attention to safety when using it. good luck!
]]>
With the maturity of battery technology, batteries dedicated to equipment manufacturers such as 18650 have entered the hands of consumers. However, these new lithium batteries are not as standardized as rechargeable AA in supermarkets. You must make sure to buy a working 18650 battery, and you need to know how to avoid counterfeit batteries.
What Is an 18650 Battery?
18650 is a rechargeable lithium ion battery. The emergence of lithium-ion batteries has completely changed the use of portable devices. They are everywhere, from our smartphones and cameras to fitness gadgets and flashlights.
An 18650 battery is a cell that's 18mm x 65mm in size. The name, 18650, refers exclusively to the size of the lithium-ion battery cell, but there can be minor variations even here. The 18650 has become the new gold standard for replaceable and rechargeable batteries.They offer the performance of a lithium-ion cell, a capacity in the range of 1800mAh to around 3500mAh, and an output of 3.7 v-4.2v.
Choosing the right 18650 battery for the job
The structure of the 18650 is not exactly the same. The most important feature to consider when looking at an 18650 battery is the continuous discharge rating (CDR), also known as ampere capacity.
In order to find the right battery for you, you need to match the battery's CDR to the power consumption associated with your device. If you choose the wrong battery, the battery will become too hot and damage its service life. Overheating may even cause the battery to explode, leak or damage your device.
How to avoid using fake 18650 batteries
Like any product, you must beware of fakes. It is common for many suppliers to buy cheap batteries, repackage them into brands, and then sell them as genuine products. This is not only a waste of your money, but also potentially dangerous. The only way to distinguish between genuine and fake batteries is by weight. Most brands will provide the actual battery weight in the product details. You should cross-reference any batteries you buy online with the manufacturer's specifications.
Be safe!
]]>
The single leg structure of the quadruped robot dog relies on two motors to transmit power to the drive shaft through the belt. As shown in the figure:
The body part can adopt 4 pieces of open source brushless drive.
Because electric screwdrivers have better productivity and ease of use, while reducing costs, they are becoming more and more popular with DIY operators. So it is important to have an electric screwdriver in your toolbox. Various electric screwdrivers are used for different purposes. To find the right electric screwdriver for yourself, you need to know some common questions and their answers.
Each screwdriver has its maximum and minimum RPM during operation. Generally, an electric screwdriver with a higher RPM has a lower torque potential. And the smart electric screwdriver has adjustable speed and induction function, SQ-ES126 is a smart screwdriver with multi-directional angle sensing.which can better match your operation.
In automation, you don’t need a handle or trigger screwdriver, you can use an installable screwdriver. But for workers, there are many options, such as angled, pistol, or in-line grips. However, a portable smart electric screwdriver with a sophisticated system and powerful functions is the first choice.ES-126 is a MCU based on STM32, equipped with high-definition OLED digital display, supports Type-c interface 5V power supply and firmware upgrade.
The drill bit of the electric screwdriver can be replaced to complete various screw sizes and styles. A complete set of electric screwdrivers are equipped with matching screw heads to meet all the needs in daily work.
CONVENIENT: The electric screwdriver has a shape that is easy to hold, so it is very convenient to use. Due to their high-speed capabilities, these tools can work faster. Some models are equipped with practical accessories, such as LED lights and a series of screws, which can provide better comfort for work.es-126 have three LEDs on the front are illuminated at close range, allowing users to use and comfort in dark environments.
LESS LABORIOUS: While using an electric screwdriver, you would need fewer efforts. When a workpiece requires a large number of screws, these tools are ideal for that job. Electric screwdrivers allow you to undertake a range of jobs with the same tool.
EFFICIENT: These tools allow to insert screws accurately and quickly. Electric screwdrivers have a powerful drill capability that provides a lasting effect.
VERSATILE: In most electric screwdrivers, two things are common i.e. variable speed and reverse action. Variable speed assures more control and efficiency while working and reverse action is a hallmark feature that allows to quickly insert screws and remove them. Due to their adjustable speed, electric screwdrivers offer fast work at a time.
COST-EFFECTIVE: You require various types of screwdrivers in your toolbox to get the perfect results. These tools come in a set that has different shaped screwdrivers. Each one is best suited for its job. If you get a multipurpose electric screwdriver, you can enjoy the benefits of different capabilities integrated into one device. In this way, you can work efficiently at a very low cost.
These are the benefits of using an electric screwdriver over the traditional one. Now, you can make up your mind for buying these tools after reading all the important aspects related to it.
]]>
Brushless DC motors can be divided into the following three main uses:
Continuous load applications: Mainly in areas that require a certain speed but do not require high speed accuracy, such as applications such as fans, pumps, hair dryers, etc., such applications are low-cost and mostly open-loop control.
Variable load applications: Mainly applications where the speed needs to be changed within a certain range, and there is a higher demand for motor speed characteristics and dynamic response time characteristics. Such as household appliances, spin dryers and compressors are good examples. In the automotive industry, oil pump control, electric controllers, engine control, etc., the system cost of such applications is relatively higher.
Positioning applications: Most industrial control and automatic control applications fall into this category. This type of application often completes energy transmission, so there are special requirements for the dynamic response and torque of the speed, and the requirements for the controller are also higher. . Photoelectric and some synchronization equipment may be used for speed measurement. Process control, machinery control, and transportation control are many of these applications.
Main features of stepper motor:
1. Generally, the accuracy of a stepper motor is 3-5% of the step angle, and it does not accumulate.
2. The maximum temperature allowed by the appearance of the stepper motor.
The high temperature of the stepper motor will first demagnetize the magnetic material of the motor, resulting in a decrease in torque and even loss of step. Therefore, the maximum allowable temperature of the motor surface should depend on the demagnetization point of different motor magnetic materials; generally speaking, the demagnetization of magnetic materials The points are all above 130 degrees Celsius, and some are even as high as 200 degrees Celsius, so the external temperature of the stepping motor is completely normal at 80-90 degrees Celsius.
3. The torque of the stepping motor will decrease with the increase of the speed.
When the stepper motor rotates, the inductance of each phase winding of the motor will form a back electromotive force; the higher the frequency, the greater the back electromotive force. Under its action, the phase current of the motor decreases with the increase of frequency (or speed), resulting in a decrease in torque.
Compared with traditional screwdrivers, electric screwdrivers are obviously more time-saving and labor-saving. In particular, electric screwdrivers have more bit options and are more often used in daily use. It can easily deal with different screws. Electric screwdriver is exquisite, portable and compact, and is more suitable for quartz watches, cameras, radios, computers, mobile phones, drones and other conventional household appliances, to meet most of the daily repair needs.
Advantages of an Electric Screwdriver
Efficient
Compared to traditional manual screwdriver, the screwdriver has a very convenient way to use the shape, which can be used for a long time. These tools allow to insert screws accurately and quickly.Their high-speed configuration allows us to use them to complete all the work in a short time. Since they are electrically operated, no manual force is required. Therefore, even after a long time of use and work, you will not feel tired. It is convenient and efficient.
Cost-effective
An electric screwdriver enables a cost-effective process. You can complete tasks quickly, so a screwdriver can provide you with an amazing return on investment. Use a screwdriver to directly increase your productivity while ensuring that the quality of work is also improved. You can use the screwdriver for a long time and complete more work in the shortest time.
Build in light
Electric screwdrivers may also have built-in lights. Therefore, they can be used in low-light spaces and situations. You can also use them in dark areas and dimly lit areas and corners. The lighting reduces errors and provides easier task handling. At the same time, the torsion can also be set to facilitate various use need.
Comprehensive
A screwdriver may also have a screw bit“set” so that it can be used for different applications, which fully cover most of the objects in home life. You simply need to change the screw bit to be used for different device repair work.
Direction sensing
The new intelligent electric screwdriver may has multi-directional angle sensing function. You just need to give it a little direction with your hand, and it will easily screw or unscrew according to the direction sense, and you don't need to use a little bit of force.
Higher productivity, less time wasted, higher comfort, and overall more efficient working days. This happens when you have the right tools for the job. Now, you can decide to buy these tools after reading all the important aspects about them. To buy an electric screwdriver, visit sequremall.com, an company focus on smart DIY tool.
]]>Brief introduction of brushless motor
Brushless DC motor is a typical mechatronics product, which is composed of motor body and driver. Because the brushless DC motor is operated by self-control, it will not add another starting winding on the rotor like the synchronous motor with heavy load starting under variable frequency speed regulation, and it will not produce oscillation and out of step when the load changes suddenly. At present, the permanent magnet of medium and small capacity brushless DC motor is mainly made of Nd-Fe-B material with high magnetic energy level. Therefore, the volume of rare earth permanent magnet brushless motor is one frame number smaller than that of three-phase asynchronous motor with the same capacity.
brushless motor diagram
Replace the traditional contact commutator and brush. It has the advantages of high reliability, no reversing sparks, low mechanical noise, etc., and is widely used in high-end audio jacks, video recorders, electronic instruments and automated office equipment.
The brushless DC motor is composed of a permanent magnet rotor, a multi-pole winding stator, and a position sensor. The position sensor commutation of the stator winding current in a certain sequence according to the change of the rotor position (that is, it detects the position of the rotor pole relative to the stator winding, and generates a position sensing signal at a certain position, which is processed by the signal conversion circuit To control the power switch circuit, switch the winding current according to a certain logical relationship). The working voltage of the stator winding is provided by an electronic switch circuit controlled by the output of the position sensor.
There are three types of position sensors: magnetic sensitive, photoelectric and electromagnetic.
Brushless DC motors using magnetic-sensitive position sensors, whose magnetic-sensitive sensor components (such as Hall elements, magnetic diodes, magnetic sensitive pole tubes, magnetic resistors or application-specific integrated circuits, etc.) are mounted on the stator assembly. To detect the change of the magnetic field generated when the permanent magnet and the rotor rotate.
The brushless DC motor with photoelectric position sensor is equipped with a photoelectric sensor at a certain position on the stator assembly, a light shield is installed on the rotor, and the light source is a light-emitting diode or a small light bulb. When the rotor rotates, the photosensitive components on the stator will generate pulse signals intermittently at a certain frequency due to the effect of the light shield.
Brushless DC motors using electromagnetic position sensors are equipped with electromagnetic sensor components (such as coupling transformers, proximity switches, LC resonance circuits, etc.) on the stator assembly. When the position of the permanent magnet rotor changes, the electromagnetic effect will cause the electromagnetic sensor Produces a high-frequency modulation signal (the amplitude of which varies with the position of the rotor).
In terms of structure, brushless motors and brushed motors have similarities. There are also rotors and stators, but the structure is opposite to that of brushed motors; the rotor of brushed motors is a coil winding, which is connected to the power output shaft, and the stator is a permanent magnet. Steel; the rotor of the brushless motor is permanent magnet steel, which is connected to the output shaft together with the casing. The stator is a winding coil. The commutation brush used by the brush motor to alternately transform the electromagnetic field is removed, so it is called a brushless motor ( Brushless motor).
Brushless Motor And Esc Single Drive Based On Odrive
You need to consider your riding style, the speed you want to achieve, and the range you want to achieve. These will save you a lot of trouble in the future. Read this article with these needs and wishes.
Lithium polymer batteries(Lipo) have a reputation as a cheap power source for most electric skateboards. They are suitable for almost any housing setup and are perfect for custom AT or competition versions where you are trying to get a lot of power and ground clearance at the same time. Lithium polymer batteries are very sensitive to puncture and may burn and explode if not handled properly, so you must respect them.
There are several different configurations of lithium-ion batteries. The 18650 battery only means that each battery in the battery pack has a diameter of 18 mm and a length of 65 mm. All batteries are either in parallel or in series.
Parallel (P): The positive pole is connected to the positive pole, and the negative pole is connected to the negative pole. Then, the connected battery basically becomes a larger battery with the same voltage but double Ah.
Series (S): A battery that connects one positive electrode of one battery to the negative electrode of the next battery. This will increase the voltage of the battery, thus providing you with more power.
So to sum this up neatly, a battery with more cells in Parallel will have a longer range, and batteries with more cells in Series will have more power and speed.
What are the most common electric skateboard batteries?
At present, the most common are 36v – 48v batteries in the range of 6 to 12 S, of which 1 to 4 P is the most standard parallel setting. All batteries have two battery styles in their design. For example, a 10S4P battery, it just means that you have 10 batteries in series and 4 batteries in parallel.Of course, when you create a battery, you can add any number of batteries. Just make sure that any ESC you choose to use can handle battery power.
Can you charge the battery?
Yes it is. You can separately purchase a balanced charger to charge different batteries. Every time you charge the battery, you are fixed in a charging cycle. If you are not afraid of overcharging, you can use a battery level indicator, which is very simple. A good rule of thumb is to not let the battery charge drop below the 50% full threshold when storing the circuit board. It is never recommended to completely drain the battery.
A short note about the battery box
Although most parts can be purchased online, the battery and ESC case are still a feature of most customized versions. No matter what kind of case you build or buy, you need to make sure that there is enough space to place the battery in the case and a little space for the circuit board to bend. Or use heat shrinkable film to fix the battery.
Regarding which battery is suitable for which application, as electric skateboards become more and more popular, new innovations will continue to appear, so please follow the DIY trend so that you can rotate when new technologies become available.
good luck!
]]>Customer unboxing review for SQ-D60
https://hackaday.com/2021/04/27/review-sequre-sq-d60-temperature-controlled-soldering-iron/
Influencers review for SQ-D60
https://www.youtube.com/watch?v=DcI2TR9hKhc
Product Description:
Out of the box the soldering tip comes detached, and with the help of the given hex key you can easily slide in the hot tip and screw it down to a reasonable torque in order to get it fixed. Once you are ready to go just plug in the power adapter on the port given at the far end of the unit and attached it to a suitable power supply ranging from 12- 24 volts. This is a very versatile operating
voltage and such adapters can be easily found anywhere around you. While holding the device you can notice a tiny OLED display up front surrounded by two buttons marked A&B. Once the device is connected to a power source The OLED immediately lights up and displays you the heating process in terms of degrees Celsius and is updated in real time. We would like to add here that the heating process of the soldiering tip is very fast as compared to a conventional soldiering iron. The two given buttons A&B can be used to toggle between the temperature range. once the temperature range is set, the soldering iron it starts to heat up the tip. On back of the device, we also have a very interesting port selection. Apart from the auxiliary power supply a USB type C port is also available. We shall come back to that later on this article. Owing to its tiny size let's not confuse and consider it under power in terms of performance. The on board 60 forts heating element is capable enough to get your soldering tip up to temperatures of about 400 degrees Celsius. The SQD60B enables you to select the temperatures ranging from 100 degrees Celsius all the way up to 400 degrees Celsius with a tolerance of about plus minus 5%. Whereas the model SQ- D60A is capable of reaching up to 350 degrees Celsius with a low range of about 280 degrees Celsius. It is to be kept in mind that not only the upper limit of soldering iron is necessary but also in some scenarios you might need to work with circuit airy that is far more delicate and sensitive therefore the soldering iron also needs to perform at a very low temperature let's say of 100 degrees Celsius as mentioned earlier. This comes in very handy when you are working with transistors and IC's that are more likely to burn off if the tip of your soldering iron is far too hot. Like its predecessors the SQ- D60B also has the open architecture STM 32 processor on board. It allows this soldering iron to have features like dual temperature sensors and motion sensors as well. The data from these sensors are fed into this processor and later on can be used to update from where which then can make this unit capable of intelligent temperature monitoring an active usage session. Smart features are also available on board, such as the sleep time is ranging from one- 30 minutes. This means that once the temperature is set on the unit and device is not in use it can go into a sort of low power or sleep mode and maintain the tip temperature at the desired range. It is also worth mentioning that the power spectrum and hitting ratio off the SQ- D60 is very versatile. For example, at 12 volts it can output a power of about 17 Watts and it takes the soldering tip to get from 30 degrees Celsius all the way up to 280 degrees Celsius in just 100 seconds. Whereas if you plug it in at 24 volts of supply then it can generate a peak power of about 60 Watts that can get the dip from 30 degrees Celsius all the way up to 300 degrees Celsius in just 13 seconds. Considering the tiny size of this device these numbers are really impressive combined with the smart features on board this device can be very useful for someone who is into electronic projects.
Final Verdict:
With a price tag of about $30, the SQ- D60 provides you with ultimate performance in terms of soldiering. It is very accurate and precise to use. The onboard USB type C allows you to interface with the unit and the operating voltages are also very versatile. The Handy sized and tiny form factor of this unit enables it to travel with you anywhere you go and provide you with very handy features when you are not around your working table. We highly recommend the SQ- D60B for college students and someone who is working on electronic circuits very often.
Since there is no single universal screw for the frame, there must be a variety of screwdrivers and screwdriver bits that can insert or remove any type of screw you encounter. Then, most importantly, you may find that you need manual and electric screwdrivers for surrounding maintenance and diy projects. If you are just starting to equip the toolbox, pay close attention to the following types of screwdrivers.
Screwdriver operation
The screwdriver has only two purposes: inserting screws and removing screws. Although the type of screwdriver is defined by the tip that matches the specific design of the specific screw head, you will find other changes in how the screwdriver operates. Understanding these design differences will enable you to choose the best way to use screws and use any type of screwdriver in any given project.
Manual screwdriver-the most recognizable variation of hand tools-consists of a thick handle and a cylindrical steel handle, the end of which is located at the working tip of the screwdriver (in some cases, in order to match multiple screw head patterns, it has interchangeable screwdrivers head). Because the handle is larger than the tip, only moderate twisting force is required to turn the screw. When using a manual screwdriver, the screwdriver must be lifted from the screw head every time the screw is rotated, and then repositioned before the next rotation.
The smart electric screwdriver saves time and reduces the need to lift and reposition the screwdriver bit after each turn. The internal ball bearing mechanism allows the user to perform multiple rotations with easy front and back wrist movements. By switching the button on the screwdriver, the action of the ratchet can be changed from one direction to another, so that the DIYer can either insert the screw (clockwise movement) or remove the screw (counterclockwise movement).
In the final analysis, whether you prefer a manual screwdriver or an electric screwdriver, the most important factor is the matching of the screwdriver head and the screw head.So which ones are most commonly used?
Screwdriver type: flat head / slotted
Although flat-head screws are no longer widely used in construction, you can still find them in furniture structures, small cabinet manufacturing projects, and certain electrical applications, which makes flat-head screwdrivers not only suitable for prying lids from paint cans.
The flat-head screwdriver bit will mark the size of the bit and the length of the steel handle. The tip size ranges from a few millimeters (small enough to tighten glasses screws) to an inch or more (suitable for industrial size screws). When using a screwdriver with a flat-head screw, please choose a screwdriver that matches the width and depth of the groove on the screw head.
Screwdriver type: Phillips
Phillips screw with a flared "+" on the head. When you need to install, either manual or electric screwdrivers can work normally, but choose an electric screwdriver with interchangeable cross heads to get the most efficient construction. The SQ-ES126 smart electric screwdriver allows users to preset the screw depth, eliminating the possibility of drywall or excessive insertion of drywall screws.
Screwdriver type: hex wrench
Hex wrenches (also called hexagon socket screwdrivers), hexagon head screws are usually small, often used in handles and some mechanical devices. The size range of screwdrivers and drill bits fits approximately 0.03" to 3/8" hex screw recesses. It is most suitable for installing small fixtures, such as towel bars.
Screwdriver type: Robertson
The Robertson screw has the unique advantage of reducing the slip of the screwdriver. Also known as "square slot screw", this screw head was developed by Canadian inventors in the early 20th century. Whenever the tip of the screwdriver slipped out of the slot, he was tired of the damaged slotted screw. Today, Robertson screws have groove sizes ranging from 1/16" to 3/16" and are widely used in construction and renovation projects.
Screwdriver type: plum blossom
Torx screws-sometimes called star screws-quickly became a favorite for serious DIY enthusiasts-have a 6-point sunken star tip, range in size from 0.031" to 0.81", and are indicated by a "T" number (From T1 to T100). Common building sizes are T15 and T25. Regardless of the screw size, there is a corresponding Torx screwdriver or screwdriver bit.
Electric screwdriver users generally choose Torx screws because they can prevent the power supply from sliding. Torx screws are commonly used for structural frames and a variety of DIY purposes.
That's it for today's sharing. I hope you who like DIY can also make your own satisfactory works.
See you next time!
]]>The power of the electric soldering iron should be determined by the size of the welding point. The larger the solder joint area, the faster the heat dissipation, so the power of the electric soldering iron should be larger accordingly. The general power of the soldering iron is 20W 25W 30W 35W 50W, etc. After the soldering iron is used for a long time, a layer of oxidation will be formed on the tip of the soldering iron. Tips with oxidation will tend to turn black and not accept solder as it did when it was new. You can use a traditional wet sponge, but due to expansion and contraction, this tends to shorten the life of the tip. In addition, the wet sponge will temporarily reduce the temperature of the tip when wiping. A better option is to use brass sponge, as shown in the picture below.2. Solder wire
The components must be cleaned and tin-plated. When the electronic components are stored, due to the effect of air oxidation, there is an oxide film on the component pins, and there are other dirt. You can scrape off the oxide film with a knife before soldering and apply a layer immediately solder tin, and then solder. After the above treatment, the components are easy to be welded firmly, so that the non-wetting rarely occurs.
The soldering temperature and soldering time should make the temperature of the soldering iron higher than the temperature of the soldering tin, but not too high. It is better that the soldering iron tip touches the rosin and just smokes. If the soldering time is too short, the temperature of the solder joint will be low, which will lead to insufficient melting of the solder joint, rough solder joints, and easy to cause cold welding. On the contrary, if the soldering time is too long, the solder is easy to flow, and it is easy to overheat the components and damage the components.
The amount of solder on the solder joint should not be too little or too much. The solder should just immerse all the component pins on the solder joint and the outline should be faintly visible.
Pay attention to the position of the iron and the welding point. When beginners are welding, they generally move the electric iron back and forth in the welding place or squeeze it hard. This method is wrong.The correct method is to contact the welding point with the tin surface of the electric iron, so that the heat transfer area is large and the welding speed is fast.
After soldering, check for missing soldering, cold soldering, and component short circuit caused by solder flow. Cold welding is difficult to find, you can use tweezers to grip the component pin and gently pull it, if there is sharking, it should be repaired immediately.
Note:
★Before each soldering operation, wipe with a wet sponge to remove oxides and dirty on the tip of the soldering iron. Be careful not to use too much force, and avoid splashes of residue, scalding people or scalding materials.
★The soldering iron tip should be coated with a layer of solder before use.
★The soldering iron should not be air-heated for a long time during use, so as not to burn the tip and core of the soldering iron.
★When the soldering iron is not in use or temporarily not in use, the tip of the soldering iron should be dipped in tin and placed on the soldering iron stand to protect the soldering iron and personnel safety.
★If the soldering iron tip has been damaged or deformed or pinholes appear, stop using it to avoid damage to the soldered object.
★When the soldering iron is not in use, turn off the power and unplug it to avoid scalding others.
]]>SQ-001 Eelectric Solder Iron for FPV Unboxing Experience:
Unboxing experience off the SQ- 001 is very minimalistic and focus oriented. With a neat and tiny box, we are provided with the basics yet essential contents required to fulfill the needs of any project. The box itself is very small and you will be surprised to know that a full fledge item expect within. Opening the box, you are provided with a user or instruction manual, a soldiering stand which also has a dedicated sponge to wipe off the tip, a power given with an XT- 06 connection on it, the hot tip or better known as the tip of the soldering iron, and Lastly the unit itself. While holding the unit for the first time it is unbelievable that such a powerful and capable tool can be packaged in such a smart and sleek form factor. We would like to mention here that the soldiering tip comes separated from the unit itself in order to protect it while shipping and it can be swapped later on as well.
Product Description:
At first the entire box of SQ- 001 is very minimalistic and contains the very basics of a soldering iron, but we are particularly interested and the unit itself. So, let's get a closer look at the features and tricks of this tiny soldering iron. The overall footprint of the device is very similar to a white board marker. It has similar width and length to it and it is made out of Stainless Steel,Copper. Up front we have a tiny OLED display which shows various parameters an operating mode of this soldiering iron, followed by we have two selectable mode buttons which are very tactile and responsive to touch, on back of the device we have the power port. This is all that is to discuss about the device aesthetics and appearance. This tiny device along with the soldiering tip weighs just 30 grams which is very unbelievable figure. However, we would like that such a device should have an advocate weight to it so that the operational fatigue can be minimized and a better grip could be provided to the users. On the other hand, this lightweight soldiering iron also proves to be a very handy tool when you are on the go or not near your working bench. It can be very useful for college students while they are through their projects and can easily pack this tiny soldiering can be packed into their backpacks to take it anywhere with them let's say college or University. The assembly of the SQ- 001 is also very simple and can be done in a matter of seconds. In order to get your device prepared you just need to insert the hot end or the tip into the dedicated slot on the device itself and tie down the tiny screw up to the recommended torque. Once this is done just insert the power cable and you're good to go. Once the power cable is connected the device immediately recognizes the power source and goes into the sleep mode. While doing this the tiny display shows the heating process of the soldiering tip in real time with temperatures being displayed affectively. It is worth mentioning here that it gets the tip ready hot enough very quickly as compared to conventional soldering irons. The next cool feature that comes loaded in the SQ- 001 which cannot be found in conventional soldiering iron units is that you can adjust the temperature of the soldering tip according to your needs and the project requirements. The earlier mentioned two buttons marked A & B can be used to increase or decrease the temperature of tip according to your needs. Once your desired temperature is reached and you need the device to be sitting idle, you can press both buttons simultaneously for a few seconds to put the device in sort of a sleep or low power mode. This is very handy when working through projects where you could be fixing something and need your soldiering iron ready and not getting cold while keeping it unattended. This maintains the temperature of the soldering tip to your fed temperature and is always ready when you need it. You should not be dazzled or confused by its tiny size. Seeing and holding this soldiering island might feel that it can be very underpowered but this is not the case. The 65 watts on board heating element is very powerful and this operate at two of the given voltage choices. The power choices are also very versatile it can be operated from a common notebook or laptop charger ranging from 12- 24 volts. The preset temperature from the factory is about 300 degrees Celsius with a very accurate tolerance of about plus minus 2%. The thing which makes the SQ- 001 very smart and stand out from conventional soldiering units is that it has a STM 32 processor on board as well. To all those who are not familiar with such a processor we would like to elaborate that this kind of computing unit is capable of open-source design and can be catered according to the needs of users. In this case the interface is a micro-USB port that can be used to download parameter files through various websites and update the firmware as well. While updating it takes almost few minutes and once it's done new features such as active sleep mode and precise soldiering tip conditions can be added. A tiny drawback for the stainless-steel construction is that if you use the SQ- 001 for a prolonged period of time let's say over 40 minutes continuously at 350 degrees Celsius the body of the unit might get as hot as 50 to 60 degrees Celsius. We would recommend 2 divide your project in several sections and then use the unit effectively this would both give you more time to work on your project and concentrate and also the soldiering unit can have a break as well.
People Comment on Soldering iron Use in FPV:
WOW, love it
Got the for my FPV bag but now use it all the time on projects. Easy and fast to heat up.
Must have solder iron
When I first recieved this iron in the mail I only had a half charged 4s lipo to test it and my first impressions was wow, it heated up so fast especially because it was at so I tried re soldering some of the wires on my drone and I thought my solder was bad giving me grey dull solder joints and not enough flux, but i was wrong the sq-001 iron made the solder joints the best they've ever been, it also holds it temperature really well, so I wonder how much better it will before with a 6s lipo at 24v, I highly recommend this to anyone who does big or small soldering and for us fpv pilots who break stuff in the field, good job sequre.
SQ-001 is a great addition for any hobby
The SQ-001 is a great little soldering iron for the R/C workbench or out on the track. I am blown away on how powerful it is for it’s size. The features and price can’t be beat. I would highly recommend this iron to anyone. Thanks Sequre for a great product.
Final Verdict:
For someone who is actively involved in dealing with miniature electronic circuits, or is undergoing a project that involves complex circuitry and needs to perform various repairs the SQ- 001 solder iron is a very tiny and capable soldiering unit. It is very portable and the sleek design means that you can carry it around very easily. The on board 65 watts heating element is also very impressive paired with the smart processor and practical features that keep your device ready for you at any given time are very handy. We highly recommend the SQ- 001 for college students or anyone who needs to spend more time on electronic circuits.
FPV is actually called FPV Drone or Racing Drone.
Current FPVs do not have the ability to cruise autonomously, so they are not actually drones. It belongs to the category of remote control aircraft, also called model airplane. Now the mainstream FPV are all four-axis multi-rotor drones.
The main components of the FPV include the following, let us take a look:
The main components of FPV include the following, let's take a look:
Flight control
Flight control is the core of the drone traveling through the aircraft. Its main function is to adjust the flight according to the input parameters of the sensor (IMU) and the real-time output signal of the user's command.
power
The power system includes ESC, motor and blades. The ESC is to control the speed of the motor, and the motor and blades generate power through rotation. So as to control the speed and altitude of the FPV in flight.
Of course, most of its branches are fixed with screws. In order to save time and improve efficiency during production and maintenance, you can use a smart electric screwdriver to make your FPV stronger.
Battery
Flat knitting machines generally use lithium batteries, that is, lithium polymer batteries (Li-Po). Generally, the number of S refers to how many batteries are connected in series (S is series, P is parallel).
BTW, self-spot welding of battery packs is also a technical problem, which requires good tools and spot welding quality. Recommend a very practical spot welding machine SQ-SW1. Very friendly to newcomers and old friends! And its service life can be as long as 10 years.
Picture transmission and Remote control system
The image transmission system includes the image transmission module on the fuselage, the camera and the FPV glasses on the ground.The remote control installed on the fuselage and used on the ground is usually included in the remote control purchased.
Machine frame
The frame is the skeleton of the traversing machine. At present, the mainstream is the X-shaped frame, which is basically made of carbon fiber materials. According to different shaft ratios, it is also divided into width X, length X, normal X, and different X racks. Different racks have different advantages and disadvantages in terms of speed and stability.
For its production, maintenance, and wiring, the most commonly used soldering iron is an electric soldering iron, and different soldering iron tips are suitable for racks of different specifications.
Distribution board
The distribution board is a circuit board, and the four motors are connected to the distribution board to obtain operating voltage. These components are not necessarily separate. Of course, it is the second core part of FPV, and it also has certain technical requirements for the selection of electric soldering iron and welding technology.
Having said that, I believe everyone will understand that although FPV is small in size, it is powerful.However, it is different from drones that capture nature in television images.
In the next issue, let us understand the difference between it and drones. See you next time!
]]>
In fact it is very simple. As long as you have a Battery Clamp or a Lithium Battery Fixed Bracket, this can actually solder many parallel packages very well.
The first thing to do is to cut a small piece of nickel and then bend it a bit. It is very flexible and easy to operate.Therefore, this is only a small part of the actual operation.
First, you must arrange the batteries in a row and fix them, then use your fingers to fix the nickel strips and bring the welding head close to the center position, then release your fingers and press the spot welding switch (in order to fix the position of the nickel strips in the center). Next, you can spot weld each battery again without using your fingers (small batteries can be spot welded twice for each battery)
Some spot welding machines may be more troublesome to operate by one person, so some tools are needed to assist us in the operation,so that the production process is safer and more efficient. Here, I recommend a very practical suit-sw1, it has three suits for everyone to choose:
1. Use a split welding pen to work. (The most common mode)
2.Use the foot pedal to connect so that sw1 can be controlled by the pedal.
3.Use the automatic trigger of the spot welding pen to work.
I’m sure it might be easier to step on the pedals, but honestly, if there is no standard workbench outdoors, the third possibility is easier to operate.
Lithium battery welding requires more experience or skills for operators, because it requires us to follow appropriate steps and methods as much as possible, and determine feasible solutions based on actual conditions. However, there are many things worth noting, and improper operation may even cause incalculable losses and troubles.
So let us carefully understand the precautions for welding lithium batteries.
Take the 18650 lithium battery as an example. Connecting three 18650 batteries in parallel and soldering with an electric iron will not explode, but your wrong method may cause safety hazards.
①The surface of 18650 cannot be directly soldered with an electric soldering iron.
②If the welding should be done by spot welding the nickel tape with the connecting piece, or by the wire connection welding.
③The time for soldering with an electric soldering iron should be controlled within 5 seconds.
Precautions for using lithium batteries:
Precautions for using lithium batteries
①Please read the product manual carefully and follow the operating steps;
②Check whether the contacts of the battery are clean, wipe them clean with a damp cloth if necessary, and install them in the correct polarity direction after drying;
③Do not mix old and new batteries or different types of batteries;
④Do not put the battery in the water, otherwise it will cause the battery to malfunction; do not throw it into the fire, otherwise it will cause the battery to rupture or explode.
Therefore, if you want to ensure the highest possible safety and efficiency in actual use, you need to pay attention to the use of lithium batteries. If you want to perform further operations, you should also combine the actual situation to avoid serious problems. Due to lack of common sense’s consequence.
The above is today’s sharing, I hope every DIY will bring you happiness.
Be careful!
]]>